If you came here looking for the plugin click here.
Update: This plugin has been tested with the new FAQ-Tastic Lite plugin and works as expected.
FAQ-Tastic is a wonderful WordPress plugin for maintaining a FAQ on your website. My company recently made a decision for one of its products to run both the blog and FAQ for the product off of WordPress. Using FAQ-Tastic will enable the folks in charge of the FAQ to make changes without having to modify any code.
While the developers of FAQ-Tastic apparently went to great lengths to add AJAX effects to the admin area for this plugin the actual display in the post or page is rather boring in the fact that it does not include any AJAX and simply displays the answer directly under the question. You can additionally list all of the questions which will link to the question and answer lower in the page but that keeps the users scrolling up and down the page. The authors of FAQ-Tastic list in their FAQ that they are planning on AJAXifying the plugin at some future time, but we don’t have time to wait for them to do it.
A simple solution would be to add a small amount of Javascript and CSS code to collapse the answers and only display them once the question has been clicked.
There is one caveat though…Ratings do not collapse with the answer, which causes them to not display correctly, and thus have been hidden using CSS in this plugin.
Now for instructions on implementing it
- Open header.php from your WordPress theme in your favorite text editor or the WordPress theme editor.
Add the following code just above the line reading <?php wp_head(); ?>
Add the following code just after the line reading <?php wp_head(); ?>:
You can add some additional styling by adding a open/close indicator next to the question by adding the following into the css styles listed in step 3.
ol.faq h3 {
    padding-left:20px;
    background: url(/wp-content/themes/YOURTHEME/images/open.gif) top left no-repeat;
}
ol.faq h3.active {
    background: url(/wp-content/themes/YOURTHEME/images/close.gif) top left no-repeat;
}
You can download these sample open/close images here
These gif images should be extracted/uploaded to ‘wp-content/themes/YOURTHEME/images’
And now that you are saying I’m not going to do this because it is too complicated…Don’t worry I have also written a plugin with the information I have provided above that will automatically implement this just by activating the plugin.
The plugin can be downloaded from WordPress.org repository.
Instructions on using the plugin
- Download the plugin from here
- Upload the ajaxify-faqtastic directory to wp-content/plugins/
- Open the admin section of WordPress, click on Plugins and then Activate this plugin.
- Simple as that…you are done.
If you don’t want to go through subscribing to a mailing list to get the FAQ-Tastic plugin, download using the following links:
Plugin
Manual
Change Log
1.4 (2009-02-27):
- Update to new version numbering
- enqueue styles and scripts instead of printing directly to the head
0.3 (2008-08-12):
* Updated for WordPress 2.6 compatibility
0.2 (2008-03-26):
* Initial Public Release
Download
AJAXify FAQTastic version 1.4
Archived Versions
Update:The Lightview JS WordPress plugin is hereby completely end of life. My plugin was in conflict with the Lightview per domain license and has been removed from the WordPress plugins repository. Users seeking a Lightview WordPress plugin should see the Lightview Plus plugin written by Thorsten Puzich. As an alternative to Lightview please see my Shadowbox JS plugin.
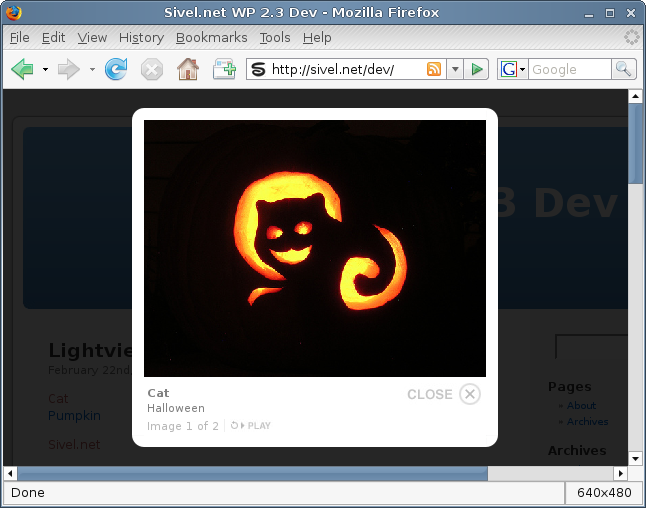
A media viewer application written entirely in JavaScript. Using Lightview, website authors can display pictures, movies, websites, inline content and more in all major browsers without navigating away from the linking page.
This plugin uses Lightview written by Nick Stakenburg.
Javascript libraries supported are: Prototype + Scriptaculous. Prototype + Scriptaculous are included with the plugin as the versions packaged with WordPress are below the minimum requirements.
This plugin support the WordPress [ gallery] shortcode. By simply having this plugin activated and $lvGallery set to true which is the default, Lightview JS will be used to display the images in your gallery.
Screenshots
Installation
- Upload the `lightview-js` folder to the `/wp-content/plugins/` directory
- Edit lightview-js.php and modify $lvGallery based on the comments preceeding the variable. Please note that this is an optional step. Lightview JS will function properly without modification.
- Activate the plugin through the ‘Plugins’ menu in WordPress
Upgrade
- Deactivate the plugin through the ‘Plugins’ menu in WordPress
- Delete the previous `lightview-js` folder from the `/wp-content/plugins/` directory
- Upload the new `lightview-js` folder to the `/wp-content/plugins/` directory
- Edit lightview-js.php and modify $lvGallery based on the comments preceeding the variable. Please note that this is an optional step. Lightview JS will function properly without modification.
- Activate the plugin through the ‘Plugins’ menu in WordPress
Usage
- If you are using the [ gallery] shortcode the following steps are not required. When using the [ gallery] shortcode this is automatic.
Create a link in your post in the following format:
<a href="http://domain.tld/directory/to/image.jpg" class="lightview">Image</a>
The above link can be to pretty much anything including websites, video files, YouTube, Google Video, inline content.
This is the minimum code required to use this plugin.
Please see the markup on the Lightview javascript authors usage page for more information such as sizing the media. . Please keep in mind that I did not write the Lightview javascript I only created a WordPress plugin that implements it.
Be sure to include `class=“lightview”` as this activates the plugin.
If `rel=“gallery[album]”` is included the portion listed here as `[album]` will group multiple pictures into an album called album.
NOTE: Do not use the visual editor for doing the above use the code editor. When modifying this post in the future do not use the visual editor; please use the code editor always.
Examples:
<a href="http://domain.tld/directory/to/image.jpg" class="lightview" rel="gallery[album]">Image</a>
<a href="http://domain.tld/directory/to/image.jpg" class="lightview" rel="gallery[album]"><img src="http://domain.tld/directory/to/image.jpg" /></a>
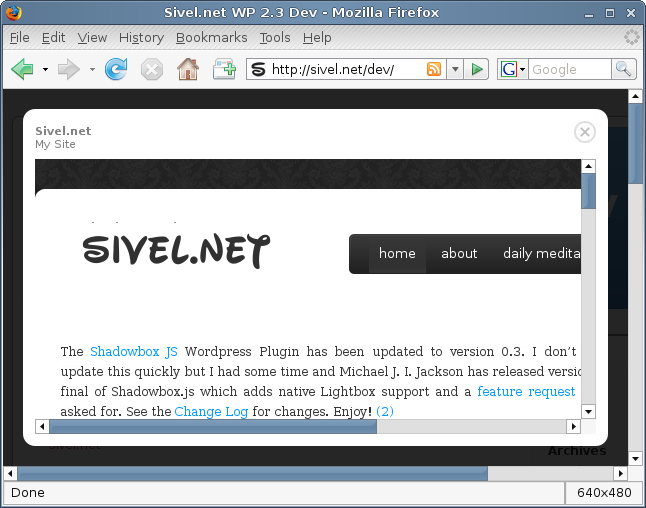
<a href="http://sivel.net/" class="lightview" rel="iframe" title="Sivel.net :: My Site :: fullscreen: true">Sivel.net</a>
Change Log
(2009-03-03):
- Plugin marked as end of life and removed due to licensing conflicts
1.5 (2009-02-27):
- enqueue styles and scripts instead of directly printing to the head
1.4 (2008-08-25):
- Updated version number scheme
- Updated code for readability
- added support for [ gallery] shortcode
0.3 (2008-08-12):
- Update for WordPress 2.6 compatibility
0.2 (2008-03-14):
Download
REMOVED
Comments
Posted February 26, 2008 by sivel
The Shadowbox JS WordPress Plugin has been updated to version 0.3. I don’t often update this quickly but I had some time and Michael J. I. Jackson has released version 1.0 final of Shadowbox.js which adds native Lightbox support and a feature request that I asked for. See the Change Log for changes. Enjoy!
Comments
Posted January 23, 2008 by sivel
Comments
Posted October 15, 2007 by sivel
I am releasing version 0.2 of the No Widget Category Cloud WordPress plugin that I have written for use on my site.
Creates a function that can be placed in a wordpress template for a category cloud that exists without the requirement of widgets or a widget ready theme.
I created this plugin after I started using a single column theme that is not widget ready. I found that there were multiple plugin widgets available, but no plugin that would allow me to just place a php function into my theme to display a category cloud.
Some ideas for oter uses of this plugin:
- Install WP-Sticky and Exec-PHP. Create a Sticky post which will stay at
the top of your page and type the php code for this plugin in the post. Now
you have a Category Cloud that stays at the top of your page.
Screenshots

Installation
- Upload the `no-widget-category-cloud` folder to the `/wp-content/plugins/` directory
- Activate the plugin through the ‘Plugins’ menu in WordPress
NOTE: See “Other Notes” for Upgrade and Usage Instructions as well as other pertinent topics.
Requirements
- WordPress 2.x
- Web server that supports PHP
Upgrade
- Deactivate the plugin through the ‘Plugins’ menu in WordPress
- Delete the previous `no-widget-category-cloud` folder from the `/wp-content/plugins/` directory
- Upload the new `no-widget-category-cloud` folder to the `/wp-content/plugins/` directory
- Activate the plugin through the ‘Plugins’ menu in WordPress
Usage
<?php nw_catcloud(small_size,big_size,size_unit,align,orderby,order,min_posts,hide_empty,title); ?>
small_size = font size, integer (default 75)
big_size = font size, integer (default 200)
size_unit = %, px, pt (default %)
align = left, right, center, justify (default left)
orderby = count, name (default name)
order = asc, desc (default asc)
min_posts = minimum number of posts, integer (default 1)
hide_empty = 0,1 (default 1, 1=yes,0=no)
title = string (This can contain HTML to format the title)
- Open the theme files, in your favorite editor, that you wish to add the category cloud to (index.php, single.php, page.php, etc…).
- Add a line that looks like above. You can also use the defaults by not specifiying anything between the parentheses. See example 2 below.
- Enjoy.
- As I mentioned in the description you can also use this plugin with Exec-PHP and it would make a nice combo with WP-Sticky.
Examples:
<?php nw_catcloud(75,200,'%','left','name','asc',1,1,'<br />
<h2 class="posttitle">Categories</h2>
<p>'); ?>
<?php nw_catcloud(); ?>
Change Log
0.2
To Do
- I am open to suggestions.
- I am sure I will think of something.
Credit
I’ve got to give credit where credit is due. And that credit goes to Lee Kelleher and his Category Cloud Widget. I used a lot of his code in this plugin modifying it where needed to make it work the way I wanted.
Download
No Widget Category Cloud version 0.2
Comments
Posted September 18, 2007 by sivel
Update:As of February 2, 2009 I will no longer be updating the Polaroid on the Fly WordPress plugin; this plugin is now end of life.
I am releasing version 0.7 of the Polaroid on the Fly plugin.
Creates polaroids of images on the fly for thumbnails in posts. Support for lightbox included. Built on modified Polaroid-o-nizer v0.7.2 sources.
I wanted to mimic the Polaroid look that you can achieve with Google Picasa to add thumbnails to my posts. I found a plugin titled WP-Polaroidonizer that did what I wanted to some extent but it didn’t have the right feel to it.
The other problem I have with Polaroid-o-nizer and WP-Polaroidonizer is the lack of security. When I mention lack of security there is by default no way to restrict external sites and users from generating Polaroid pictures using your installation of Polaroid-o-nizer.
The goal of this plugin was to use rel= style html img tags to transform a simple URL into a Lightbox URL in which there is a thumbnail image in your post which is linked to an image that can be loaded using Lightbox or any of the Lightbox clones/alternatives.
Screenshots
Requirements
- WordPress 2.0
- PHP GD Module
- Lightbox - Not really a requirement but a recommendation if you want to have a nice ajax/javascript image overlay on your page
Installation
- Upload the `polaroid-on-the-fly` folder to the `/wp-content/plugins/` directory
- Activate the plugin through the ‘Plugins’ menu in WordPress
Upgrade
- Deactivate the plugin through the ‘Plugins’ menu in WordPress
- Delete the previous `polaroid-on-the-fly` folder from the `/wp-content/plugins/` directory
- Upload the new `polaroid-on-the-fly` folder to the `/wp-content/plugins/` directory
- Activate the plugin through the ‘Plugins’ menu in WordPress
Usage
Create an image link in your post in the following format:
<img src="http://domain.tld/directory/to/image.jpg" rel="polaroid" alt="Picture[album]" />
Be sure to include rel=“polaroid” as this activates the plugin.
If alt=“Picture[album]” is included the portion listed here as Picture will be displayed as the image title in Lightbox and the portion listed as [album] will group multiple pictures into an album called album. The alt tag is not required and if used the [album] portion is not required. Read the Lightbox usage for more details on Titles and albums.
Be sure to place each html img tag on a separate line.
This plugin supports the following image formats: jpg, png, gif
NOTE: Do not use the visual editor for doing the above use the code editor.
FAQ
Q: What Do The Error Messages Mean:
A:
Source image resolution below min (200x200px)
The image referenced in the image tag has a resolution less than 200x200 pixels.
Source image resolution above max (2000x2000px)
The image referenced in the image tag has a resolution greater than 2000x2000 pixels.
Source URL Incorrect of does not Exist
The URL of the image referenced in the image tag does not exist.
Background color is invalid use RGB only
The background color specified on the options page is not a valid 24 bit RGB color. When written, RGB values in 24 bits per pixel (bpp), also known as Truecolor, are commonly specified using three integers between 0 and 255, each representing red, green and blue intensities, in that order. For example:
white is 255,255,255
black is 0,0,0
red is 255,0,0
green is 0,255,0
blue is 0,0,255
Source image unknown file type (jpg,gif,png only)
You should never see this message. The regex used to find the img tag with rel=“polaroid” will only select img tags including jpg,gif and png. I figured hey why not create a useless image it may come in handy some day.
PHP GD Module Not Found. Polaroid on the Fly will not work. See http://us.php.net/gd for installation information.
You need to have the PHP GD Module Installed. This plugin requires the GD module to make the polaroid image. This plugin will not function without this module.
PHP GD Module Found. However, it does not include support for GIF. You will not be able to use a GIF for the source image. See http://us.php.net/gd for more information.
You have the PHP GD Module installed but the GD version does not support GIF images. This plugin will still work but you will not be able to use a GIF for the source image.
Change Log
0.7 (2008-07-31):
- Updated for compatibility with WordPress 2.6 (wp-content and wp-config.php changes).
- Changes to gen-polaroid.php to accommodate Ubuntu PHP GD Packages.
- Updated path to the font ttf file in gen-polaroid.php.
- Output image now in png format instead of jpg.
0.6 (2008-01-23):
- Added ability to opt in to using Lightbox.
- Added option to select how the image will open. (ie. new window, self)
- Added option to specify the hright and width of the thumbnail
- Added option to reset all options to their defaults
- Updated descriptions on the Options page.
0.5 (2007-10-24):
- Added error reporting. Errors will be displayed as a replacement to the image in the post.
- Added images for use when displaying the above errors.
- Added error reporting for GD Module. Errors will be displayed on the options page.
- Added functionality to opt in to using encoded URLs.
- Fixed case sensitvity in regex used to match the img tag (now case insensitive).
- Removed large amounts of uneeded code in the Polaroid-o-nizer script.
- Converted all files to UNIX format.
0.4 (2007-10-03):
- Added options page (Options->Polaroid on the Fly)
- Added functionality to opt in to security restrictions
- Added functionality to not require the use of tinyurl.com and fopen
- Added functionality to display the photo caption using the alt text
- Added support to change the background color from the options page
- Removed requirement for .htaccess
- Renamed the Polaroid-o-nizer files
- Changed references to Polaroid-o-nizer files
0.3 (2007-09-18):
To Do
- Add features for x and y offset
- Add features for rotation angle
- Add additional error reporting for the offset and angle
- Add functionality to options page to generate a URL for placement elsewhere on the site.
- Add functionality to cache the polaroid images.
Download
Polaroid on the Fly version 0.7
Archived Versions


